Build Your Own Home Sauna: Complete DIY Instructions for Every Step
Disclosure : This post may contain affiliate links or paid partnerships. I may earn compensation if you click a link or make a purchase, at no additional cost to you. See my disclosure for more info.
Your body has been asking for this for a long time.
That quiet heat. Tension releasing from places you didn’t know were holding it. A room that exists purely for restoration. You want that at home, and you’ve wanted it for years. So you start researching. And immediately stumble into a tangle of conflicting opinions, competing brand recommendations, and wildly varying cost estimates.
You close the tabs. Tell yourself you’ll return when you have more time. But more time is a moving target. And the sauna doesn’t get built. Here is the clarity you were looking for. Follow this guide from beginning to end and you’ll know precisely what to do, in what sequence, and why each step matters.
The Real Reason Your Home Sauna Dream Keeps Getting Postponed
The physical effort isn’t the barrier. That part is manageable for most people. What stops people is uncertainty — the fear of choosing wrongly, of spending money on something that doesn’t work, of creating a room that needs constant maintenance instead of providing daily relief.
That uncertainty comes from poor sequencing. Most people jump ahead before they’ve answered the foundational questions. They’re comparing ergonomic backrest designs before they’ve picked a heat type. Browsing a complete sauna starter set before they’ve planned their space. Solve questions in the right order, and the project becomes far less daunting than the internet makes it appear.
1. Finding Your Sauna’s Home — The Foundation of Everything
Before a single material is purchased, you need to know where this sauna will live. That choice shapes everything from materials to electrical planning. Good locations include: a spare bathroom or an underused basement corner, a sectioned-off area of a garage, a shed or separate outbuilding, or a large closet space for a compact single-person infrared cabin.
What the space must have: a nearby floor drain, accessible electrical infrastructure, and flooring that handles moisture without degrading. Concrete, tile, and rigid vinyl all qualify. Carpet absolutely does not. Also consider your cool-down routine. After a sauna session, where do you go? Proximity to a shower or an outdoor door elevates the entire experience significantly. On ceiling height: Aim for 7 feet or below. Heat rises and pools near the ceiling. An unnecessarily tall room wastes energy on warming air you’re not sitting in.
2. Steam Heat or Infrared Therapy — Choose Based on How You Want to Feel
This is the most defining decision of your build. Make it deliberately before purchasing anything else.
Traditional Finnish sauna: A stone heater generates intense, sustained heat. You add water to the stones for bursts of steam. Temperatures range from 150°F to 195°F. The experience is immersive and deeply physical. Infrared sauna: Radiant panels warm the body directly without heating the surrounding air first. Operating temperatures are lower, around 120°F to 150°F. A well-designed 2-person cedar infrared sauna runs on a standard 120V circuit. Your choice here ripples outward into wood selection, wiring, ventilation layout, and insulation requirements.
3. Sizing Your Space — Why Efficiency Beats Square Footage
More room is not better here. Oversized saunas are one of the most common and expensive mistakes DIY builders make. A room that’s too large strains the heater, resists reaching optimal temperature, and inflates operating costs without improving the experience.
Practical size targets: Solo use: 3’ x 3’ for infrared, 4’ x 4’ for traditional — a well-built 2-person traditional steam sauna fits this footprint comfortably. Two users: 4’ x 6’ provides relaxed room for both. Family sessions: 5’ x 7’ — spacious but energy-responsible. A 4-person indoor cedar steam sauna is designed for exactly this range. Match heater capacity to room volume using the manufacturer’s cubic footage specifications. An undersized heater labors endlessly. An oversized one creates hazards.
4. The Right Wood for the Job — Comfort, Safety, and Longevity
Wood selection in a sauna is a health and safety decision as much as an aesthetic one. Not every species performs well under repeated heat-and-moisture cycling. Western red cedar is the gold standard. Its natural oils resist moisture absorption, it maintains dimensional stability through heating cycles, and its surface stays comfortably cool against skin even at high temperatures.
Strong alternatives: Hemlock — budget-friendlier than cedar with a neutral scent profile, available in the same tongue-and-groove board format; Basswood — the recommended choice for users with chemical sensitivities; Nordic spruce — widely used across Finnish and Scandinavian sauna culture. Never use: Pine (sap releases at sauna temperatures), oak (absorbs dangerous amounts of heat), or any pressure-treated lumber (releases toxic compounds when heated). Install tongue-and-groove boards horizontally, ¾” to 1” thick. Round every bench edge.
5. Insulation Done Right — The Difference Between Warm and Wasteful
Proper insulation is what separates a sauna that holds heat from one that simply consumes energy without delivering it. Framing: 2×4 stud construction, 16 inches on center. Insulation values: R-13 fiberglass batt in walls, R-22 or better in the ceiling. The ceiling demands the most attention — heat rises and the ceiling loses the most energy in an under-insulated sauna.
Vapor barrier: The step most often skipped, and the one with the most damaging long-term consequences when omitted. An aluminum foil vapor barrier installed on the warm side of the insulation does two jobs: reflects radiant heat back into the room, and prevents moisture from infiltrating the wall assembly and destroying the framing behind it. Only aluminum foil barrier will do here — not plastic, not housewrap. Overlap every seam and seal with foil tape.
6. Proper Airflow — Your Sauna’s Respiratory System
A sauna without proper ventilation is a health hazard in disguise. The design is elegantly simple: one low intake vent positioned near the heater, about 6 inches above the floor, and one adjustable exhaust vent near the ceiling on the opposing wall. Fresh air enters at floor level, warms as it rises, and pushes stale air out through the upper vent. Convection does the rest.
The openings are small, approximately 4” x 6” each. Without them, carbon dioxide accumulates and sessions become physically dangerous. Between uses, trapped humidity prevents the wood from drying, which leads to mold growth inside the structure. Ventilation is a baseline health and preservation requirement.
7. Choosing a Heater — The Central Investment in Your Sauna Build
Every other element in the sauna exists to support this one. Choose it with care. Traditional electric heaters: The standard for indoor DIY saunas. Select a unit with built-in or remote controls and size it precisely to your room’s cubic footage. These units draw significant power — typically requiring a 240V dedicated circuit at 30 to 60 amps. A reference model like the Harvia 6kW KIP gives you a baseline for electrical load planning.
Engage a licensed electrician for all wiring. High-voltage errors are not recoverable. Infrared heaters: Far simpler to install. Many run on standard household current. A quality 2-person far infrared sauna plugs into a standard outlet like any appliance. For those prioritizing ease of construction, infrared is the more accessible path without meaningful compromise on the experience.
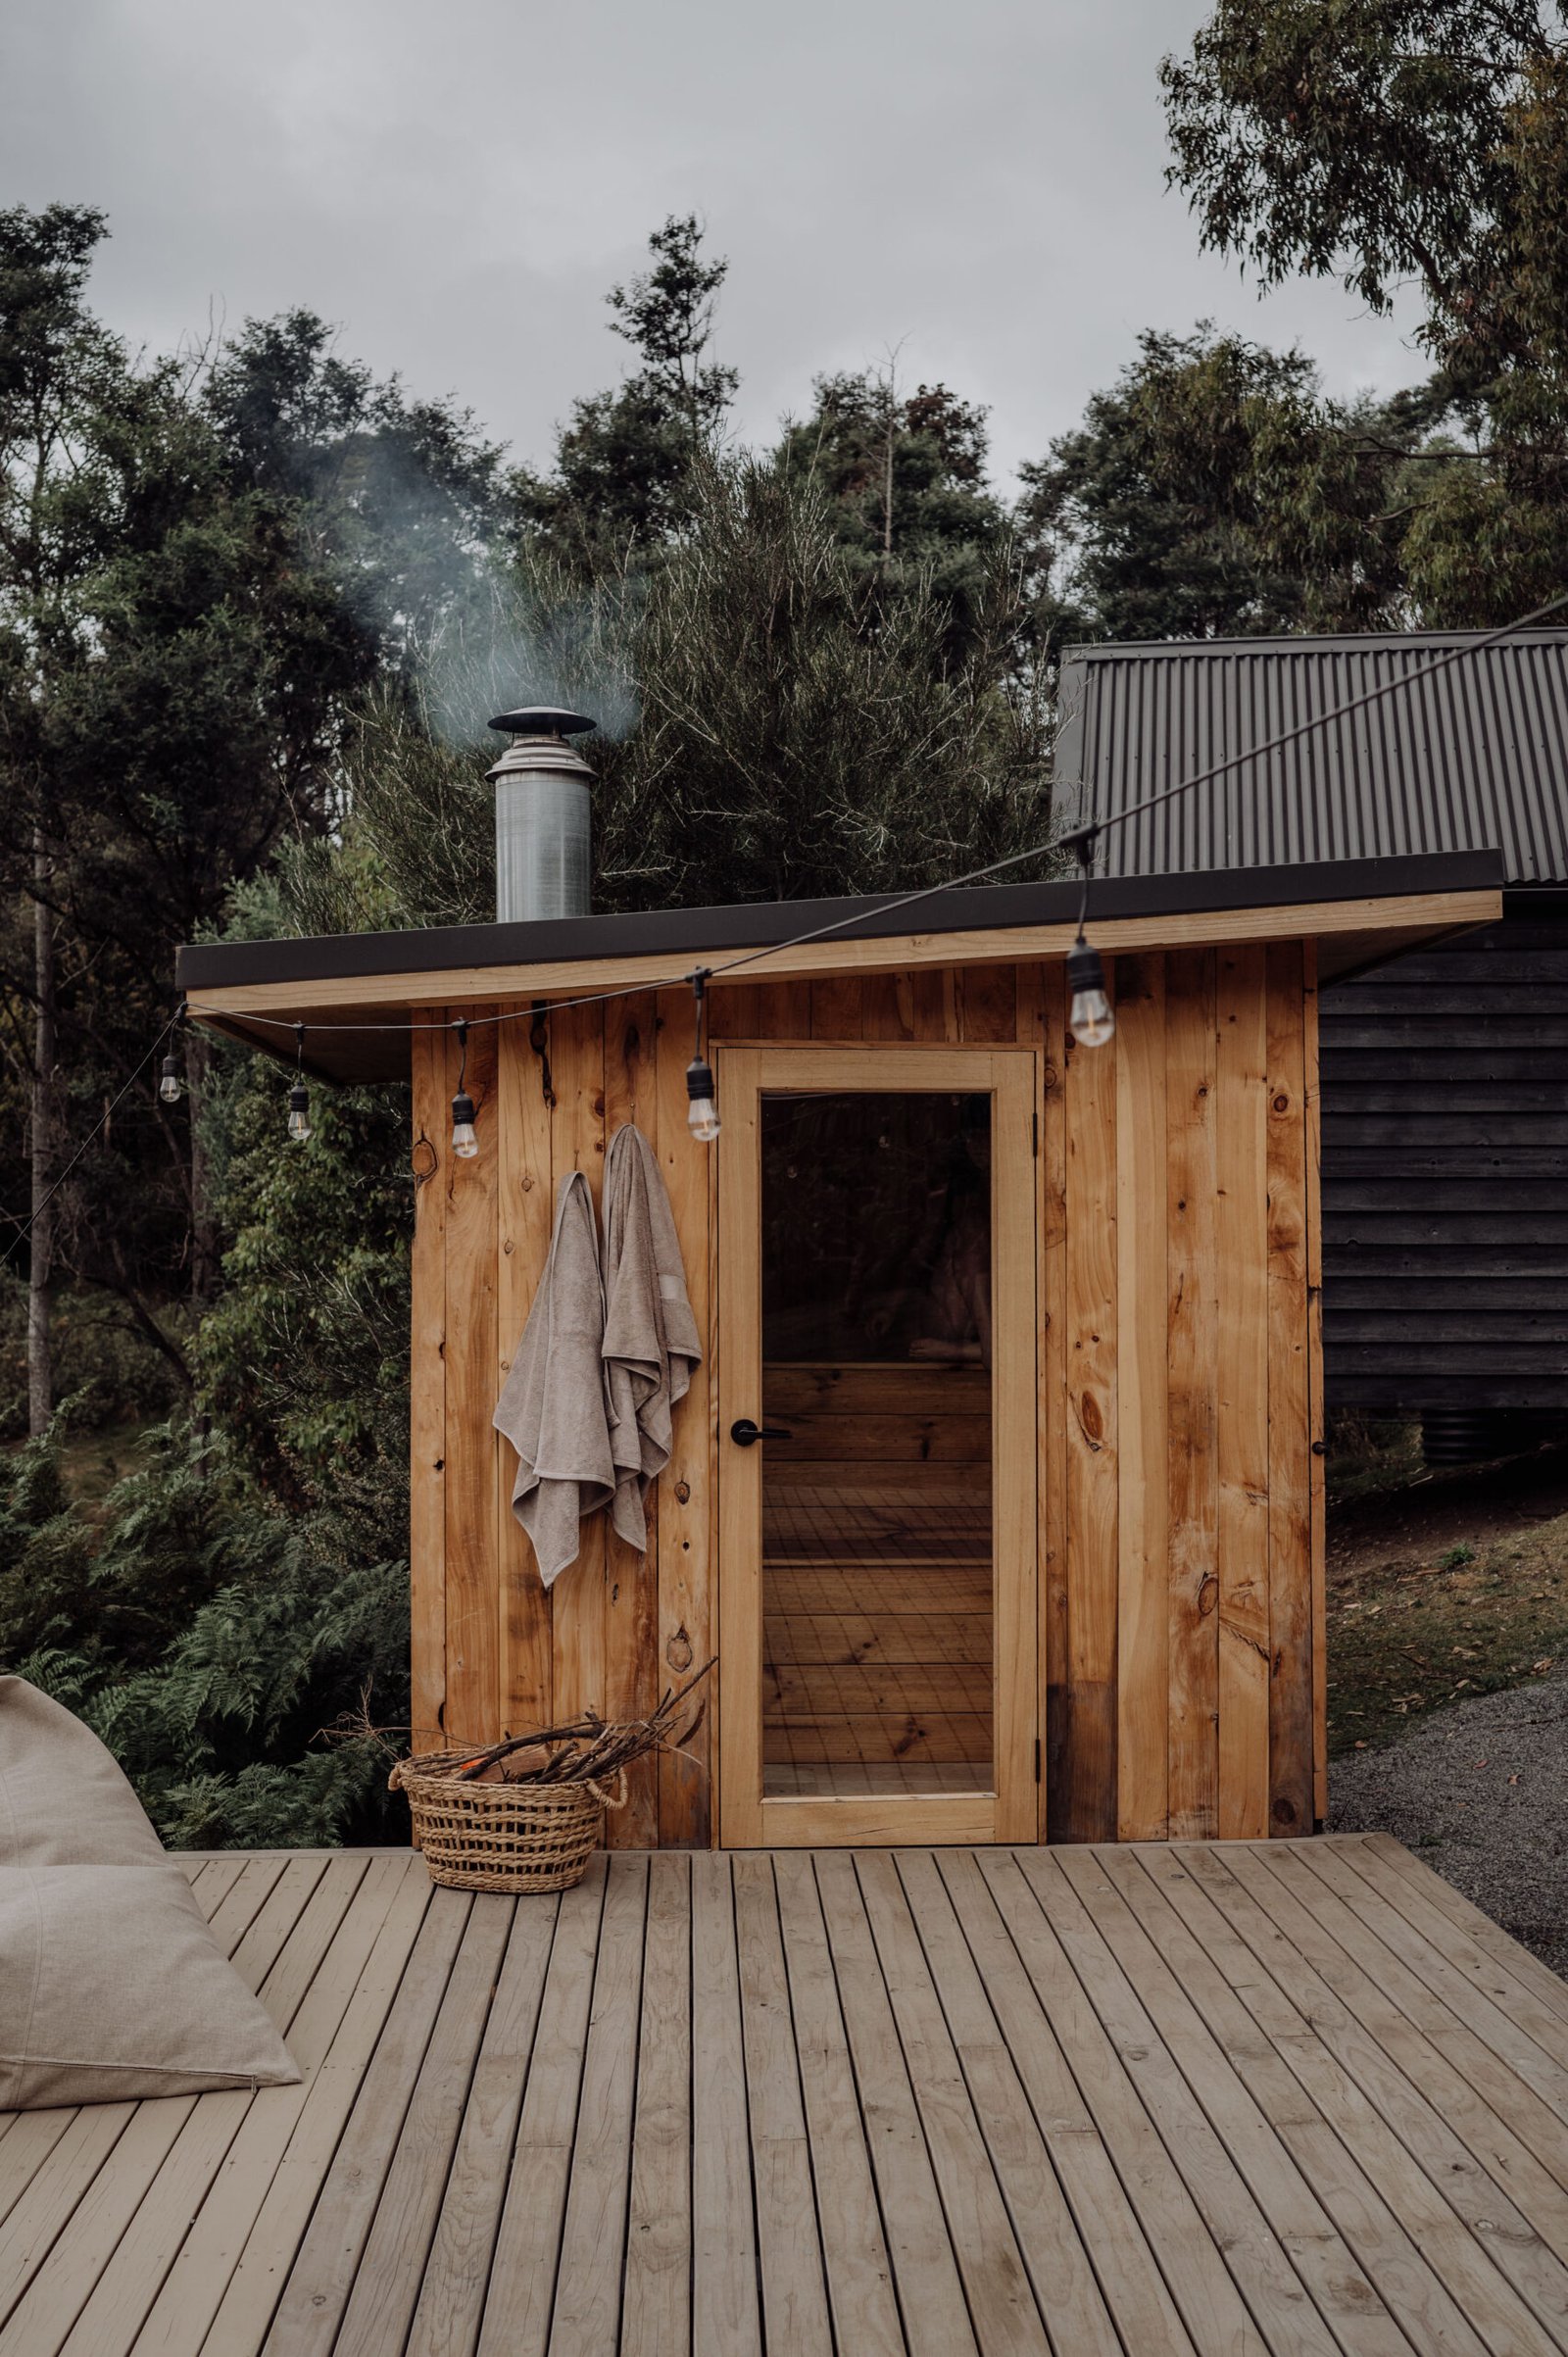
8. Your Sauna Door — Simple Requirements, Serious Consequences
The door must be solid and must open outward. These are not stylistic preferences — they are safety requirements. If a person collapses from heat exhaustion, an outward-opening door ensures emergency access from outside is never blocked.
Tempered glass doors allow natural light into the space and prevent the confined feeling common in small saunas. Solid wood doors with a glass panel achieve the same balance. Latching: use a magnetic catch or roller latch only. No locks, ever. A room at 190°F should never be lockable from the inside.
9. Lighting the Space — Functionality Meets Atmosphere
Ordinary household light fixtures cannot survive the conditions inside a sauna. Specify vapor-proof, heat-rated fixtures designed for high-temperature environments. Sauna-rated LED strips are an elegant option — they produce warm, diffused light and generate minimal heat of their own.
Place fixtures behind bench level or otherwise above the seated eye line. The goal is ambient warmth, not overhead brightness. A dimmer switch, where compatible with your fixture, lets you adjust the atmosphere from energizing to meditative without any structural changes.
10. The Finishing Layer — Accessories That Transform the Room
Bench arrangement: L-shaped layouts maximize capacity and flexibility in compact spaces. The upper bench delivers the most intense heat; the lower serves as a gentler alternative or leg rest. A well-crafted cedar sauna bench is the surface you’ll spend the most time on. Back support: A simple angled rest built from your bench wood, or a ready-made wooden backrest panel that installs without any construction.
Steam accessories: A wooden bucket and ladle is essential for traditional saunas. The act of ladling water onto hot stones to release löyly is the defining ritual of the Finnish tradition. Monitoring tools: A wall-mounted thermometer and hygrometer at seated head height lets you read conditions at a glance. A classic sand timer keeps sessions timed without a phone. Floor finish: Moisture-safe hard flooring beneath, with a removable slatted wood floor mat on top for comfort and drainage.
11. The Break-In Process — Breaking In Your New Sauna Correctly
Resist the urge to jump straight into a full session. Your sauna needs to be cured first. Run the heater to approximately 140°F and hold that temperature for one to two hours. Briefly open the door several times during the process. Curing releases trapped moisture from the wood and lets the natural resins and oils settle into a stable state. Repeat this curing cycle two or three times before your first real session.
The wood aroma during curing, particularly with cedar, can be quite strong. It normalizes quickly with subsequent uses. Once properly cured, bring the temperature up to your preferred operating range. If you built a traditional sauna, ladle water over the sauna stones and let the steam fill the room. You’ve earned every minute of it.
Your Wellness Sanctuary Is Closer Than You Think
Most people don’t realize how close they already are to having this. A home sauna isn’t a luxury reserved for large houses and large budgets. It’s a considered investment in daily recovery — one that pays dividends every time you use it. It tells your future self that rest and restoration have a permanent address in your home. Not a gym. Not a booking. Yours, any time you want it.
A few weekends of work? Yes. Some trial and adjustment? Almost certainly. Worth every moment once you’re sitting in a room you built yourself with heat you control and silence you chose? There’s no question. Mark the space. Order the materials. Begin.
🔍 Focus Keyphrase: home sauna DIY
📌 SEO Title: Home Sauna DIY: Build One Yourself — Complete Guide
🔗 Slug: home-sauna-diy-build-one-yourself
📝 Meta Description: Everything you need to build your own home sauna. From location and heating type to insulation, ventilation, and finishing touches. Your wellness upgrade starts here.