The Backyard Transformation Guide: Building a Garden Oasis with a Gazebo
Disclosure : This post may contain affiliate links or paid partnerships. I may earn compensation if you click a link or make a purchase, at no additional cost to you. See my disclosure for more info.
There’s a specific kind of frustration that comes with an unused backyard.
It’s right there. Just outside the door. And yet somehow it never calls you out.
No pull. No comfort. No soul.
A flat stretch of lawn that functions as nothing more than something to mow on weekends.
And so you stay inside.
You scroll past images of gorgeous outdoor spaces. The soft lantern light. The linen curtains. The string lights looped across a pergola like something from a Tuscan courtyard.
You tell yourself: “Someday.”
But someday has a way of never showing up.
Here’s what changes when you stop waiting and actually start: a properly set-up gazebo can take your outdoor space from forgotten to genuinely wonderful in a matter of weeks — not years.
No designer needed. No massive renovation budget. Just the right approach and a willingness to take the first step.
Let’s walk through it.
The Real Reason Your Backyard Sits Empty (And How a Gazebo Solves It)
Think about your living room. Why do you use it?
Not because it has walls and a ceiling. Because it has furniture that invites you to sit, lighting that sets a mood, and surfaces that make sense of the space. It communicates: “You belong here.”
An open backyard communicates nothing of the sort.
It’s undefined space. Formless. Your brain doesn’t know what to do with it, so it defaults to: pass through and go back inside.
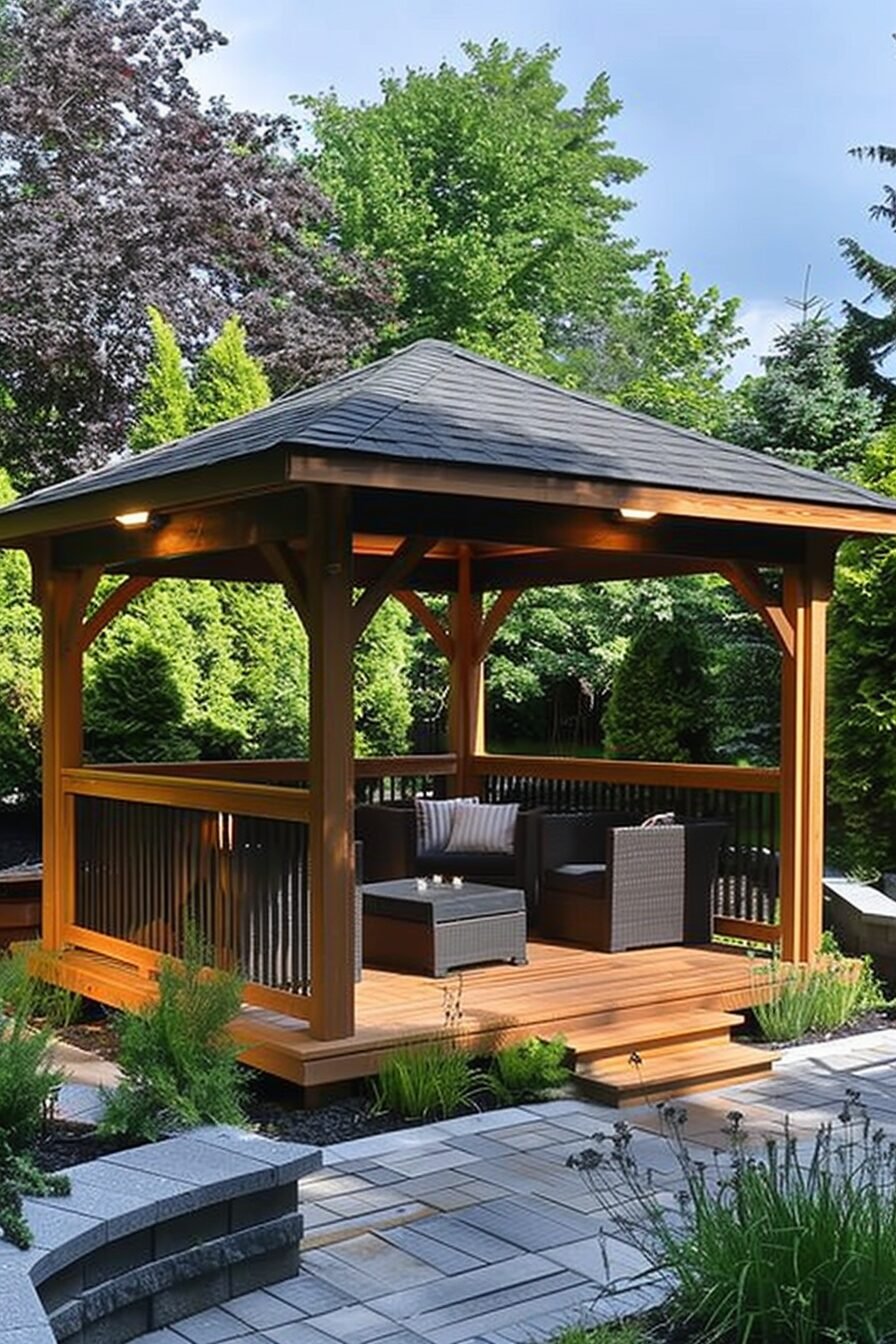
A gazebo introduces structure. It marks a zone. It tells your eye and your mind that this is a place.
But you’ll notice the gazebo-in-empty-lawn effect if you stop there.
The structure alone isn’t the destination. It’s the beginning of one. What you layer inside and around it is where the actual transformation happens.
The following tips show you how.
1. Size and Style the Gazebo to Suit Your Yard, Not Your Wishlist
The single most common gazebo mistake: buying for the yard you wish you had.
You spot a sprawling ten-post cedar structure that would look breathtaking on five acres. You order it. It arrives. And now your modest suburban garden has a building where the garden used to be.
Your yard feels smaller. More cramped. More overwhelming.
Start with your actual measurements. Then choose accordingly.
Compact yard? A small 8-foot pop-up canopy or a lean modern pergola frame fits well without dominating.
Mid-size yard? A 10-to-12-foot hardtop gazebo is the sweet spot. Enough room for a full seating arrangement, comfortable flow between seats, and maybe a small side table.
Generous yard? Think in zones. A larger pavilion can anchor a lounge area, a dining section, and perhaps a hammock nook off to one side.
And always look at your home’s exterior before finalizing a style. Contemporary house? Clean-lined metal or aluminum. Traditional or rustic home? Wood with architectural detail. When the gazebo and the house speak the same design language, everything looks intentional. When they clash, nothing looks right.
2. Scout the Location Before Committing to It
Most people pick the center of the lawn and call it done.
Most people also end up with a gazebo they never sit in. Coincidence?
The dead center of the average yard is also usually the hottest, least shaded, most exposed spot in the whole property. Add a few steps too many from the house and it quickly becomes the place you admire from the kitchen window instead of actually using.
Before you drill anything or pour any concrete, spend a serious afternoon outside.
Follow the sun. Feel where the wind comes from. Sit in multiple spots and pay attention to what’s comfortable and what isn’t.
Three things to consider:
Natural shade availability. Positioning under or near existing shade trees means you can use the space on warm summer days without baking.
Proximity to the house. The closer to your back door, the more often you’ll actually go there. Convenience drives behavior more than aesthetics does.
The view from the seat. Face the prettiest part of your garden. Turn away from the utility meter and the neighbors’ shed.
Placement done well means a gazebo you use every day. Placement done carelessly means one more thing in the yard you walk past.
Don’t rush this decision.
3. Ground It Properly with a Real Floor Surface
Grass under a gazebo is a lovely idea that turns into a muddy mess within one rainy week.
Your chair legs sink. The ground gets waterlogged. Mildew finds its way into everything at ground level. And the whole space starts to feel provisional rather than permanent.
Put a proper floor in and that all changes.
Pea gravel is the simplest option. Affordable, quick to install, and it drains immediately. Lay landscape fabric underneath, add two to three inches of gravel, and you’re done. The texture and sound underfoot are genuinely satisfying.
Pavers or flagstone are more labor-intensive but create a genuinely permanent, polished look. Suitable for spaces that you want to feel serious and finished.
Composite decking is the premium route. No splinters, no warping, minimal upkeep, and it feels warm and solid underfoot in all weather.
Whatever you choose: level the ground first. Always.
Tables rock, chairs wobble, and water collects in low spots when the base isn’t flat. Sort it out once and never think about it again.
4. Light It in Layers for Maximum Atmosphere
Good lighting is the single highest-impact, lowest-cost upgrade you can make to any outdoor space.
Not security lighting. Not a floodlight. Layered lighting. Soft, warm, deliberate.
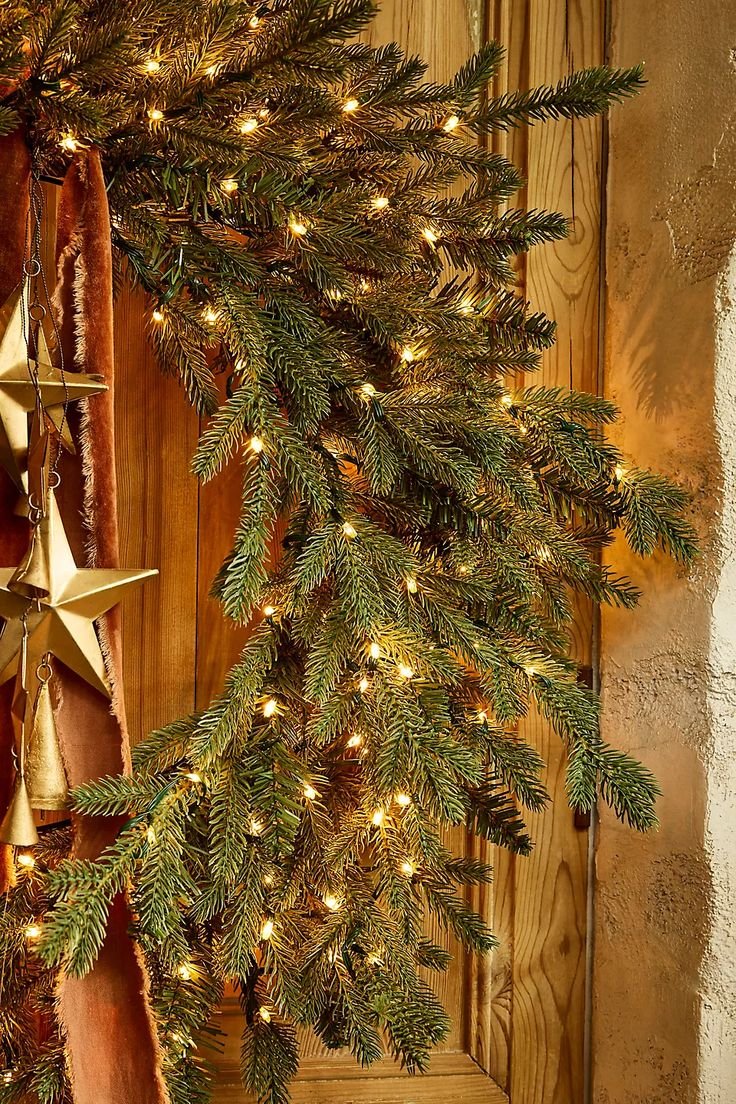
Start with ambient light. Run string lights across the top of the gazebo frame or hang them from the rafters. Use warm white bulbs without exception. Cool white makes outdoor spaces feel clinical and harsh.
Add a task light. A lantern or battery lamp on the table so you can see clearly once natural light fades. Simple, functional, and it anchors the table as the focal point of the space.
Finish with accent lights. Solar path lights around the base or LED strip lights along the structure edges. This is what makes the gazebo glow from the outside at night and look like a destination rather than just a structure.
Three layers. Done. You’ve got atmosphere that most people spend a fortune trying to achieve and never quite pull off.
And the solar options mean zero wiring, zero electricians, and nothing to switch on. It just happens.
5. Screen It Off So You Can Stop Performing and Start Relaxing
You can’t truly relax when you feel watched. That’s not a preference — it’s biology.
The moment you sense eyes on you, your nervous system stays partially activated. The tension never fully dissolves. Your sanctuary becomes a stage.
So deal with the sightlines.
Weatherproof curtain panels on your gazebo posts are fast, stylish, and incredibly versatile. Closed for privacy, tied back for breeze and openness. They install in minutes and add a dramatic visual softness to the whole structure.
A garden trellis with climbing plants creates a living screen. Install it on an exposed side and let jasmine, wisteria, or clematis run up it over a season. The result is lush, fragrant, and impossibly beautiful.
Tall potted plants are the most flexible option. Large-format planters with bamboo or ornamental grasses give immediate height and can be rearranged any time.
Keep one or two sides open. Good privacy creates shelter. Too much creates a cave.
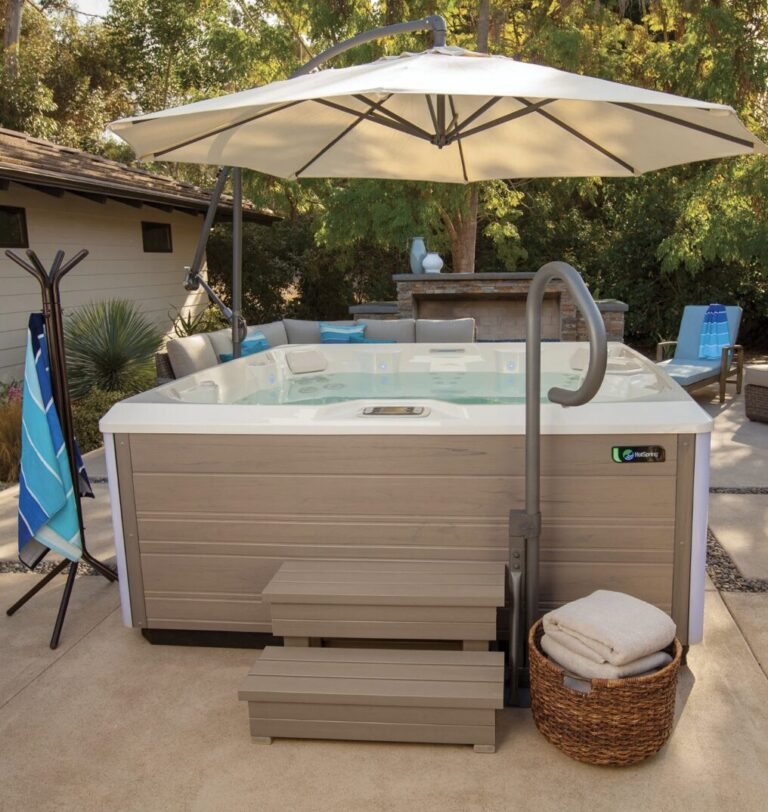
6. Furnish It with the Same Thought You’d Give an Indoor Space
You wouldn’t throw a single folding chair into your living room and consider it decorated.
Same standard applies here.
Your gazebo is a room. Furnish it like one.
Begin with seating designed for lingering. Proper deep-seat outdoor chairs or a cushioned outdoor loveseat that holds its shape and comfort. If you’re fidgeting or shifting position after ten minutes, the furniture is failing at its job.
Add a table of some kind. Coffee table, side table — anything with a flat surface. Somewhere to set a drink, a book, a plate. Without one, you spend the whole time juggling things in your lap.
Layer in the finishing touches: outdoor pillows, a lightweight throw, and an outdoor rug to define the floor plane and pull the whole composition together.
Small additions. Significant difference.
7. Use Plants to Connect the Gazebo to the Rest of Your Garden
A standalone gazebo in a bare yard looks like furniture without a room to belong to.
Plants are how you give it context. They soften edges, create transitions, and make the whole thing feel like it was planned rather than dropped from a truck.
At ground level around the base: low-growing groundcover or compact flowers. Lavender is the perennial answer here — drought-tolerant, beautiful, and the fragrance is extraordinary.
At mid-height around the perimeter: ornamental grasses or rounded shrubs that frame the structure naturally and give the impression that the gazebo emerged from the landscape.
Inside and overhead: hanging baskets with trailing ivy or ferns, a potted herb planter on the table, standing plants on decorative risers.
Layer from low to high. Density and depth are what make a garden space feel genuinely lush rather than sparse. Lean into it.
8. Appeal to More Than Just Sight When Designing Your Retreat
Beautiful to look at is table stakes. The spaces that genuinely restore you go further than that.
They engage every sense.
Sound. A small solar-powered water feature placed nearby creates a soft, constant auditory buffer between you and the noise of the world. Traffic, neighbors, ambient stress — it all recedes behind that gentle sound.
Wind chimes add gentle movement and sound — choose the deep-toned variety. The high-pitched tinny ones stop being charming after about twenty minutes.
Smell. Fresh herbs in pots nearby — rosemary, mint, lavender. Every slight breeze carries the scent over. A citronella candle on the table doubles as mood lighting and keeps the mosquitoes away.
Touch. Vary your materials. Smooth wood alongside rough wicker. Soft cushion fabric next to cool stone. The variety of textures you feel as you move through the space signals quality and completeness to your brain.
When you’ve addressed sight, sound, smell, and touch — the space has moved beyond decoration.
It becomes somewhere you actually want to be.
9. Do the Weatherproofing Work Before You Need To
Weather doesn’t announce itself. It just arrives.
And if you haven’t protected your setup before the first real storm, you’ll spend the season replacing things that could have been preserved with very little effort.
Cushions grow mold. Wood rots at the base. Metal rusts at the joints. Canopy fabric shreds under sustained wind.
Do the prevention now instead of the replacement later.
Cushions: weatherproof fabric covers or quick-dry foam inserts are essential. When bad weather is coming, move them into a covered deck storage box. Two minutes of effort.
Wood: apply a waterproof sealant or exterior stain at least every two seasons. Half a day of work, years of extended life.
Metal: look for rust spots every spring and address them with rust-inhibiting spray paint before they spread.
Fabric panels: take them down before winter. Store them folded and dry. They’ll outlast every season.
Protect what you’ve built and you only build it once.
10. Anchor the Structure. Non-Negotiable.
The final point, and in terms of safety it might be the most important.
Wind doesn’t have a gentlemanly agreement to leave your gazebo alone because you worked hard on it.
Pop-up canopy gazebos in particular are notorious for becoming airborne in storms. They lift, they spin, they crash into vehicles, fences, and neighboring properties. It happens every single year.
Soft-top gazebos: replace the basic stakes with heavy-duty ground anchors. Add sandbag weights on every leg. In high-wind areas, add tie-down ropes for additional security.
Hardtop or permanent wood structures: bolt them to a concrete slab or poured footings. This is not optional. Not something you can figure out after the first storm.
Anchoring well is a one-afternoon investment that protects everything else you’ve put into this project.
Do it first. Do it right. Then go enjoy your oasis without a second thought.
Now It’s Your Turn
Ten tips. All practical. All completely within reach.
The only thing standing between you and the backyard you’ve been imagining is starting.
Don’t try to do all of this simultaneously. That’s how projects die in spreadsheets.
Pick one. The smallest possible thing.
Hang the string lights. Order the outdoor rug. Put a single pot of lavender next to the gazebo post.
One action. Then another. Then another after that.
And somewhere in that process — faster than you expect — you’ll stop building and start simply being in a space that feels like yours.
Really, truly yours.
Your backyard is ready. Are you?
🔍 Yoast SEO Checklist
🔍 Focus Keyphrase: gazebo garden oasis
📌 SEO Title (< 60 chars): How to Create a Cozy Garden Oasis with Gazebo Tips
🔗 Slug (< 60 chars): cozy-garden-oasis-gazebo-tips
📝 Meta Description (< 155 chars): Transform your backyard into a cozy garden oasis with these expert gazebo tips on placement, lighting, privacy, and more. Start building your retreat today!